
Odoo (formerly known as OpenERP) is a self-hosted suite of over 10,000 open Odoo is a free and open-source ERP solution for multiple types of businesses. It provides customer relationship management (CRM), sales pipeline, project management, manufacturing, invoicing, accounting, eCommerce, and many more.
Odoo is one of the complete ERP solutions for your business. It comes with 30 core modules by default and provides more than 4500 community modules that can help your multiple businesses.
In this tutorial, we will the Odoo open-source ERP on the Ubuntu 22.04 server. We will install and configure the latest stable version of Odoo 16, set up the PostgreSQL database for Odoo, and lastly set up the Nginx as a reverse proxy for the Odoo application.
Prerequisites
To begin with this tutorial, you will need some following requirements:
- An Ubuntu 22.04 server – This example uses an Ubuntu server with the hostname ‘odoo-server‘.
- A non-root user with sudo root/administrator privileges – or you can also use the root user.
- A domain name pointed to the server IP address – for production, you will need a domain name for the Odoo installation.
Installing Dependencies
To install Odoo, you will first need to install some package dependencies to your Ubuntu system. The Odoo ERP is a web application mainly written in Python, so you will also need to install some Python packages.
Before start installing packages, run the following apt command to update and refresh your package index.
sudo apt updateNext, install package dependencies for odoo via the following apt command. This installation will include the latest version of Python 3.10, build-essentials for compiling Python packages, and some libraries needed by odoo.
sudo apt install git wget python3 build-essential libzip-dev python3-dev libxslt1-dev python3-pip libldap2-dev python3-wheel libsasl2-dev python3-venv python3-setuptools node-less libjpeg-dev xfonts-75dpi xfonts-base libxrender1 libpq-dev libffi-dev fontconfigWhen prompted, input y to confirm and press ENTER to proceed. And the installation will begin.
Once Python and other dependencies are installed, the next step is to install Node.js which will be used to generate static files, and install the wkhtmltopdf package for generating PDF reports.
Installing Nodejs
To install Odoo, you must ensure that Node.js is installed on your system. Node.js is used to generate static files for odoo web applications. In this step, you will install Node.js 16 from the third-party Nodesource repository.
Run the following command to download and set up the Nodesource repository for Node.js 16.
sudo curl -sL <https://deb.nodesource.com/setup_16.x> | sudo -E bash -This command will download and run the installer script, then the installer script will automatically set up the repository for Node.js, add the GPG key, and automatically update and refresh the package index on your system.

Next, run the following apt command to install the Node.js package. When prompted, input y to confirm and press ENTER to proceed.
sudo apt install nodejs
Once Node.js is installed, run the following npm command to install the ‘rtlcss’ package.
The ‘rtlcss‘ package is needed for odoo, especially if you are using the right-to-left user interface for specific languages such as Arabic and Hebrew.
sudo npm install -g rtlcssInstalling Wkhtmltopdf Application
The odoo open-source ERP required the wkhtmltopdf package to be installed. This package is needed for rendering HTML pages to PDF and various image formats via the Qt Webkit. The wkhtmltopdf package will be installed manually via the .deb package to the Ubuntu system.
Run the following command to download the .deb file of the Wkhtmltopdf package.
cd /tmp
wget <https://github.com/wkhtmltopdf/packaging/releases/download/0.12.6.1-2/wkhtmltox_0.12.6.1-2.jammy_amd64.deb>
Install the Wkhtmltopdf package via the dpkg command below.
sudo dpkg -i wkhtmltox_0.12.6.1-2.jammy_amd64.deb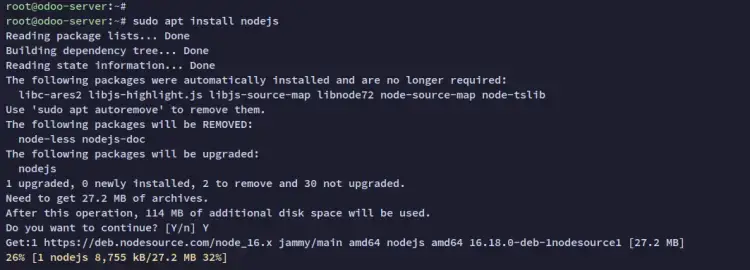
If you get an error such as a missing package, fix it via the following apt command.
sudo apt install -fAfter the Wkhtmltopdf is installed, you can verify the binary file Wkhtmltopdf package that is available by default on the ‘/usr/local/bin‘ directory. You should see two programs the ‘wkhtmltopdf‘ and ‘wkhtmltoimage‘.
ls /usr/local/binNow run the following command to verify the $PATH environment variable and make sure the ‘/usr/local/bin’ directory is available on the binary $PATH. Otherwise, the Wkhtmltopdf package will not work properly.
echo $PATHLastly, run the following command to ensure the binary path for the Wkhtmltopdf package is available. If the Wkhtmltopdf package is available, you should receive an output of the full path of the Wkhtmltopdf package.
which wkhtmltopdf
which wkhtmltoimage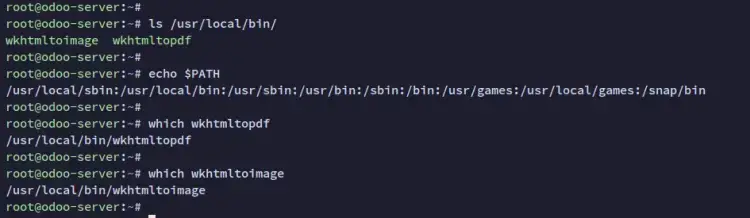
Installing PostgreSQL Database Server
The odoo open-source ERP supports databases like MySQL, SQLite, and PostgreSQL. In this step, you will install and use PostgreSQL as the default database for your odoo installation. You will also be setting up the PostgreSQL role and making changes to the PostgreSQL configuration.
Run the following apt command to install the PostgreSQL database server. When prompted for confirmation, input y, and press ENTER.
sudo apt install postgresql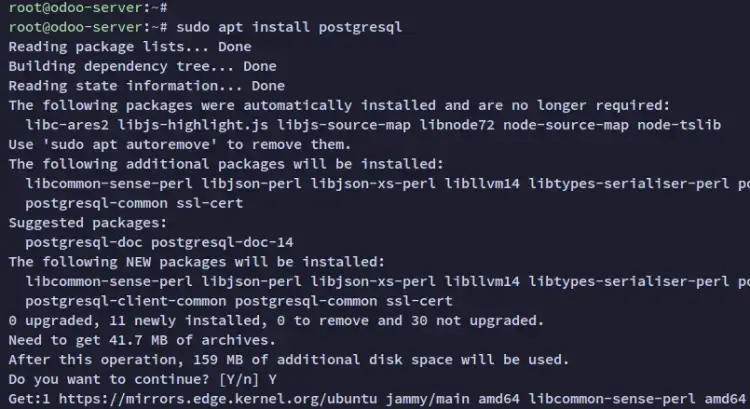
After PostgreSQL is installed, run the following command to verify the PostgreSQL and make sure the service is enabled and running.
sudo systemctl is-enabled postgresql
sudo systemctl status postgresql
In the following output, you can see the PostgreSQL service is enabled and will be run automatically at system startup. And the status of the PostgreSQL is running.

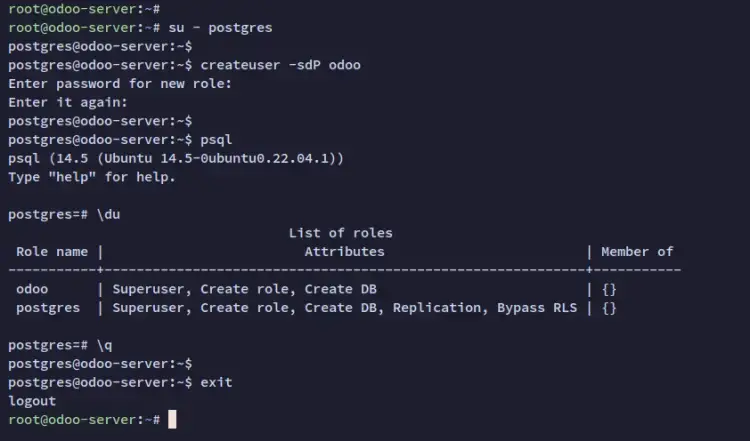
Next, you will be creating a new role for the odoo. Run the following command to log in to the ‘postgres‘ user and create a new role with the name ‘odoo’.
su - postgres
createuser -sdP odoo
Input the password for the new role ‘odoo‘ and repeat it.
Now, log in to the PostgreSQL shell via the psql command below.
psqlRun the following query to verify the list of the role on PostgreSQL and make sure the role ‘odoo‘ is available.
\\duNow input ‘\q‘ to exit from the PostgreSQL shell. Then, type ‘exit‘ to log out from the postgres user.
Now after you have created a role for odoo, you will now set up authentication for the ‘odoo‘ role.
Edit the PostgreSQL configuration ‘/etc/postgresql/14/main/pg_hba.conf‘ using the following nano editor.
sudo nano /etc/postgresql/14/main/pg_hba.confAdd the following configuration to the file. With this, you will allow access to the PostgreSQL for the role ‘odoo‘ with the password authentication ‘scram-sha-256‘.
host all odoo 127.0.0.1/32 scram-sha-256Save the file and exit the editor when you are done.
Now run the following command to restart the PostgreSQL service and apply new changes.
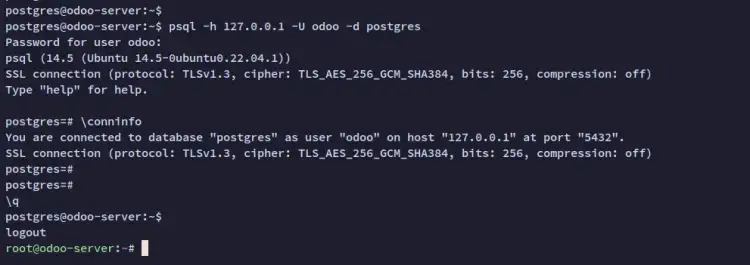
sudo systemctl restart postgresqlLastly, log in as the ‘postgres’ user and verify the ‘odoo‘ role by logging into the PostgreSQL shell via the psql command as below.
su - postgres
psql -h 127.0.0.1 -U odoo -d postgres
After logging in, verify using the following query.
\\conninfoYou should now see that you’re connected to PostgreSQL using the role ‘odoo‘.
At this point, the PostgreSQL database preparation for odoo is now finished. Next, you will start the odoo installation by downloading the source code and installing Python dependencies.
Downloading Odoo 16
For this demo, you will set up and run odoo v16 with the user ‘odoo‘. So now you will create a new Unix user ‘odoo’ and download the latest version of odoo 16 source code.
Run the following command to create a new user ‘odoo‘. In this example, the default home directory for the user ‘odoo‘ would be ‘/opt/odoo’ and the default shell is bash.
sudo adduser --system --group --home=/opt/odoo --shell=/bin/bash odooNow move the working directory to ‘/opt/odoo‘ and download the odoo source code via the following git command. In this example, you will install the odoo 16.
cd /opt/odoo
git clone <https://github.com/odoo/odoo.git> --depth 1 --branch 16.0 --single-branch odoo-server
You should now get the new directory ‘odoo-server’ inside the ‘/opt/odoo‘ directory.
Lastly, run the following command to change the ownership of the odoo source code to the user and group ‘odoo‘.
sudo chown -R odoo:odoo /opt/odoo/odoo-server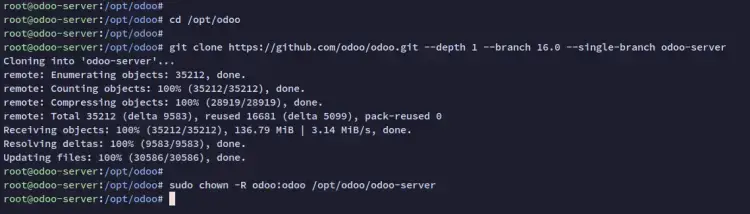
After downloading the odoo source code, you will next start the installation of Python package dependencies for odoo.
Installing Python Dependencies for Odoo
In this step, you will set up the Python virtual environment for odoo and install Python dependencies via the pip3 command.
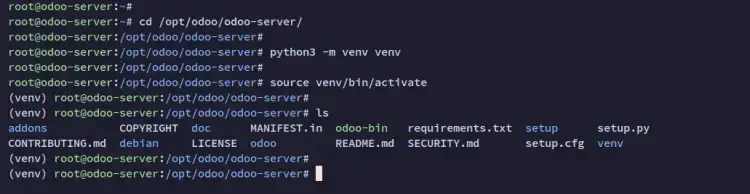
Move the working directory to ‘/opt/odoo/odoo-server‘ and create a new Python virtual environment ‘venv‘ via the following command.
cd /opt/odoo/odoo-server
python3 -m venv venv
Next, activate the ‘venv‘ Python virtual environment via the following command.
source venv/bin/activateAfter you have activated the Python virtual environment, you will see that your current shell changed to like ‘(venv) root@hostname…’.
Now run the following pip3 command to install the Python package wheel and install odoo Python dependencies via the file requirements.txt.
pip3 install wheel
pip3 install -r requirements.txt

After Python dependencies are installed, run the following command to exit from the Python ‘venv‘ virtual environment.
deactivate
You have now downloaded the odoo source code and installed Python dependencies. Next, you will create a new configuration and directory for odoo installation.
Creating Odoo Configuration
After installed package dependencies for Odoo, you will next start creating configuration for odoo and setting up odoo as systemd service.
Create a new configuration file ‘/etc/odoo.conf‘ using the following nano editor.
sudo nano /etc/odoo.confAdd the following configuration to the file. And make sure to change the ‘admin_passwd‘ and details database user and password with your details.
[options]
; This is the password that allows database operations:
admin_passwd = adminpassodoo
db_host = 127.0.0.1
db_port = 5432
db_user = odoo
db_password = odoopass
addons_path = /opt/odoo/odoo-server/addons
xmlrpc_port = 8069
logfile = /var/log/odoo/odoo-server.log
log_level  = debug
Save the file and exit the editor.
Now, change the ownership of the odoo configuration file ‘/etc/odoo.conf’ to the system user ‘odoo‘.
sudo chown odoo:odoo /etc/odoo.confNext, run the following command to create a new directory that will be used to store logs for odoo.
sudo mkdir /var/log/odooThen, change the ownership of the odoo log directory ‘/var/log/odoo‘ to the user ‘odoo‘ and change the permission to 755.
sudo chown odoo:odoo /var/log/odoo
sudo chmod 755 /var/log/odoo
Runnnig Odoo as Systemd Service
At this point, you can run odoo manually via the command line. To make it easier, you can run odoo as a systemd service. This allows you to manage odoo via the systemctl command.
You will now create a new systemd service file and run odoo as the systemd service.
To start, create a new systemd service file ‘/lib/systemd/system/odoo-server.service’ using the following nano editor.
sudo nano /lib/systemd/system/odoo-server.serviceAdd the following configuration to the file.
[Unit]
Description=Odoo 16.0 Service
Requires=postgresql.service
After=network.target postgresql.service

[Service]
Type=simple
SyslogIdentifier=odoo
PermissionsStartOnly=true
User=odoo
Group=odoo
ExecStart=/opt/odoo/odoo-server/venv/bin/python3 /opt/odoo/odoo-server/odoo-bin -c /etc/odoo.conf
StandardOutput=journal+console

[Install]
WantedBy=multi-user.target
Save the file and exit the editor when you are done.
Next, reload the systemd manager to apply a new service file via the systemctl command below.
sudo systemctl daemon-reloadStart and enable the service ‘odoo-server’ using the following command.
sudo systemctl start odoo-server
sudo systemctl enable odoo-server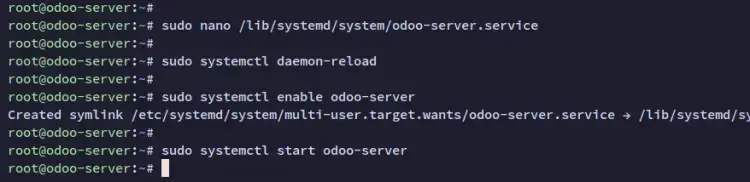
Lastly, verify the odoo service to ensure the service is running.
sudo systemctl status odoo-serverYou should receive the output of the service ‘odoo-server‘ running.

Running Odoo with Nginx Reverse Proxy
The recommended way to deploy odoo on production is by using the reverse proxy. This allows you to run odoo only on the localhost and all client access will be handled by the reverse proxy.
In this step, you will install and set up the Nginx web server as a reverse proxy for the odoo web application. You will also have the odoo installation secured with SSL. So, before start configuring Nginx, ensure that you have the domain name pointed to the server IP address and generated SSL Letsencrypt.
First, modify the odoo configuration file ‘/etc/odoo.conf‘ using the following nano editor.
sudo nano /etc/odoo.confAdd the following configuration to the file. This configuration will run odoo as the backend application that will be running on 127.0.0.1.
xmlrpc_interface = 127.0.0.1
proxy_mode = True
Save the file and exit the editor when you are done.
Now run the following command to restart the ‘odoo-server‘ service and apply new changes.
sudo systemctl restart odoo-serverNow verify the ‘odoo-server‘ service to ensure the service is running.
sudo systemctl status odoo-server
Next, you will now install and configure Nginx.
Run the following apt command to install the Nginx web server package. Input y when prompted and press ENTER to proceed and confirm the installation.
sudo apt install nginx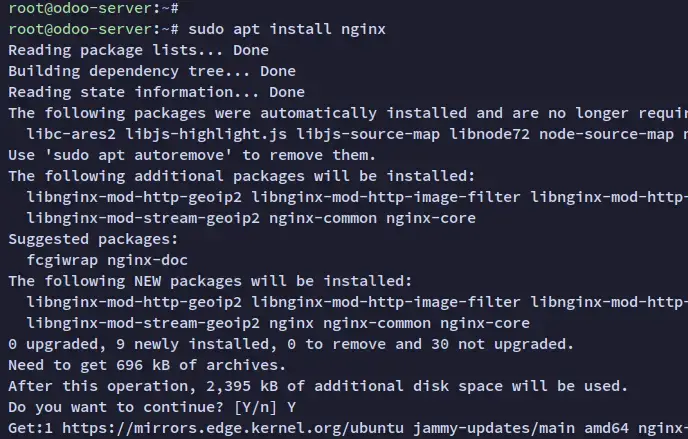
After Nginx is installed, create a new Nginx server blocks configuration ‘/etc/nginx/sites-available/odoo.conf’ using the following nano editor.
sudo nano /etc/nginx/sites-available/odoo.confAdd the configuration below to the file and be sure to change the domain name and the path of SSL certificates with your settings.
#odoo server
upstream odoo {
 server 127.0.0.1:8069;
}
upstream odoochat {
 server 127.0.0.1:8072;
}

# http -> https
server {
   listen 80;
   server_name odoo.hwdomain.io;
   rewrite ^(.*) <https://$host$1> permanent;
}

server {
 listen 443 ssl http2;
 server_name odoo.hwdomain.io;
 proxy_read_timeout 720s;
 proxy_connect_timeout 720s;
 proxy_send_timeout 720s;

 # Add Headers for odoo proxy mode
 proxy_set_header X-Forwarded-Host $host;
 proxy_set_header X-Forwarded-For $proxy_add_x_forwarded_for;
 proxy_set_header X-Forwarded-Proto $scheme;
 proxy_set_header X-Real-IP $remote_addr;

 # SSL parameters
 ssl_certificate /etc/letsencrypt/live/odoo.hwdomain.io/fullchain.pem;
 ssl_certificate_key /etc/letsencrypt/live/odoo.hwdomain.io/privkey.pem;
 ssl_session_timeout 1d;
 ssl_session_cache shared:MozSSL:10m;  # about 40000 sessions
 ssl_session_tickets off;
 ssl_protocols TLSv1.2 TLSv1.3;
 ssl_ciphers ECDHE-ECDSA-AES128-GCM-SHA256:ECDHE-RSA-AES128-GCM-SHA256:ECDHE-ECDSA-AES256-GCM-SHA384:ECDHE-RSA-AES256-GCM-SHA384:ECDHE-ECDSA-CHACHA20-POLY1305:ECDHE-RSA-CHACHA20-POLY1305:DHE-RSA-AES128-GCM-SHA256:DHE-RSA-AES256-GCM-SHA384;
 ssl_prefer_server_ciphers off;

 # log
 access_log /var/log/nginx/odoo.access.log;
 error_log /var/log/nginx/odoo.error.log;

 # Redirect longpoll requests to odoo longpolling port
 location /longpolling {
 proxy_pass <http://odoochat>;
 }

 # Redirect requests to odoo backend server
 location / {
   proxy_redirect off;
   proxy_pass <http://odoo>;
 }

 # common gzip
 gzip_types text/css text/scss text/plain text/xml application/xml application/json application/javascript;
 gzip on;
}
Save the file and close the editor when you are finished.
Now activate the new Nginx server block configuration and verify the Nginx configuration to make sure you have the correct configurations.
sudo ln -s /etc/nginx/sites-available/odoo.conf /etc/nginx/sites-enabled/
sudo nginx -t
If your configurations are correct, you will see the output message such as ‘test successful – syntax OK‘.
Lastly, run the following systemctl command to restart the Nginx service and apply new changes.
sudo systemctl restart nginxAt this point, you have finished the installation and configuration of the Nginx reverse proxy for the odoo ERP. You can now access the installation via your web browser.

Run the following command to verify the Nginx service and make sure the service is running.
sudo systemctl restart nginxYou should get the Nginx service is running.

Setting up UFW Firewall
It’s recommended to enable the firewall on your odoo installation. In this step, you will learn how to set up the UFW firewall.
By default, the generic Ubuntu server has the ufw package installed, so you can just start configuring it.
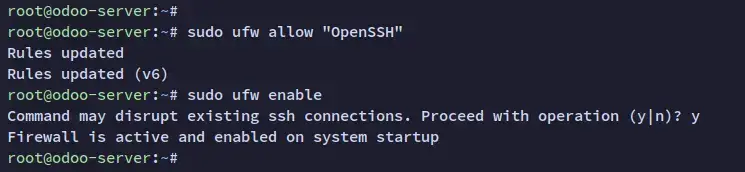
Run the following command to add the OpenSSH application to the ufw firewall. Then, run and enable the ufw.
sudo ufw allow "OpenSSH"
sudo ufw enable
When prompted for confirmation, input y and press ENTER to proceed. And the ufw firewall service will be enabled and running.
Next, run the following command to add the ‘Nginx Full‘ application. This application profile is provided by Nginx packages on the default installation and will open both HTTP and HTTPS ports for your application.
sudo ufw allow "Nginx Full"Lastly, verify the list of enabled rules on ufw. You should see two applications the ‘OpenSSH‘ and ‘Nginx Full’ enabled.
sudo ufw status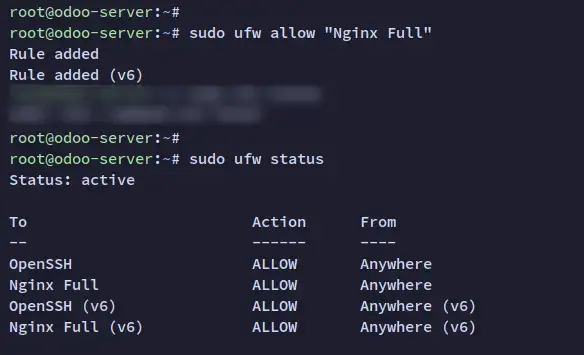
Migrating Database and Installing Odoo 16
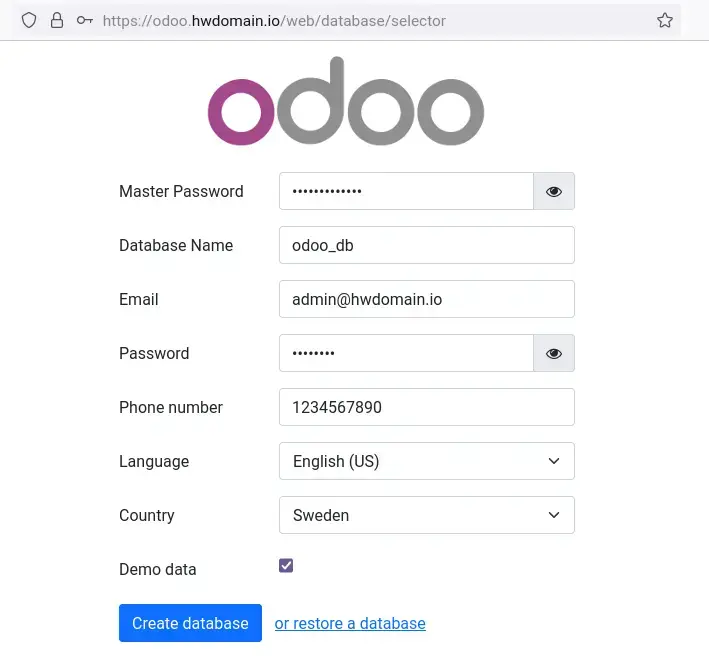
Open your web browser and visit the domain name of your odoo installation (i.e: https://odoo.hwdomain.io/).
At first, you will need to migrate the database for odoo and create a new administrator user.
The Master Password here is the ‘admin_passwd‘ that you just added on the ‘/etc/odoo.conf‘ file.
Input the new database name that will automatically be created and input details new admin user and password for your odoo installation. Additionally, you can also select the Demo data checkbox to add the demo data to your installation.
Click ‘Create database‘ to start the odoo installation.
After odoo is installed, you will be redirected to the odoo login page. Input the admin email and password for your odoo and click ‘Log In‘.
You should now get the odoo user dashboard.
Conclusion
Congratulations! You have now installed Odoo open-source ERP on an Ubuntu 22.04 server. You have now also learned the basic installation of the PostgreSQL database server and the Nginx web server that is configured as a reverse proxy.
At this point, you have fully secured Odoo installation on your Ubuntu server. You can now start adding some additional plugins/add-ons that are suitable for your business.