
Welcome to this cool guide which we will equip you with knowledge on how to install and Use Guacamole Remote Desktop on CentOS 9|RHEL 9.
Apache Guacamole is a free and open-source clientless HTML5 web application that connects to distant servers. It supports a variety of protocols, including SSH, RDP, and VNC. One of the most impressive characteristics of Guacamole is its capacity to allow remote access to many desktops from your computer, mobile phone, and so on.
Guacamole is divided into two parts:
1). Guacamole-server– which contains the guacd proxy and accompanying libraries.
2). Guacamole-client– which contains the client that will be provided by your servlet container.
Nifty features of Guacamole
- Wake-on-LAN
- Supports SFTP file transmission and clipboard copy & paste.
- Supports two-factor authentication using TOTP.
- Complies with industry standards and supports Kubernetes, RDP, VNC, and SSH.
- You can use a web browser to access your remote desktop through it. Installing additional software is not necessary on the client side.
- VNC sessions can be graphically recorded.
- Allows for audio input and output
- CAS, OpenID Connect, or SAML 2.0 Single Sign-On
Advantages of Guacamole:
- Permits access to computers from any device, such as a phone, laptop, etc.
- Allows for the addition of HTML5 remote access to the current infrastructure.
- Allow quick access to a group.
Installing Guacamole Remote Desktop on CentOS 9|RHEL 9
Go through the below steps to Install Guacamole Remote Desktop on CentOS 9|RHEL 9.
#1. Prepare the system
It is advised to prepare the system first to the latest packages before any installation.
sudo dnf update -y#2. Establish Necessary Dependencies
Activate the PowerTool and EPEL repositories as directed below.
In CentOS 9:
sudo dnf -y install <https://dl.fedoraproject.org/pub/epel/epel-release-latest-9.noarch.rpm>
sudo dnf config-manager --set-enabled crb
In RHEL 9:
sudo subscription-manager repos --enable codeready-builder-for-rhel-9-x86_64-rpms
sudo dnf install https://dl.fedoraproject.org/pub/epel/epel-release-latest-9.noarch.rpm
Run system update after installation;
sudo dnf update -yInstall the necessary packages for CentOS 9| RHEL 9 first in order to get Guacamole up and running.
sudo dnf install unzip curl make cmake wget gcc zlib-devel cairo-devel libuv-devel libjpeg-turbo-devel libjpeg-devel libpng-devel libtool uuid-devel freerdp-devel pango-devel libvncserver-devel pulseaudio-libs-devel openssl-devel libvorbis-devel libwebp-devel libssh2-devel libtheora opus lame-libs -y#3. Install Java on CentOS 9|RHEL 9
We must have Java set up and running on our server because Guacamole is a Java-based application.
Install OpenJDK 11
sudo yum install java-11-openjdk-develMake a file and configure the Java environment.
sudo vim /etc/profile.d/java11.shAdd the content below;
export JAVA_HOME=$(dirname $(dirname $(readlink -f $(which javac))))
export PATH=$PATH:$JAVA_HOME/bin
export CLASSPATH=.:$JAVA_HOME/jre/lib:$JAVA_HOME/lib:$JAVA_HOME/lib/tools.jar
Source the file to begin using it without signing out.
source /etc/profile.d/java11.sh#4. Install Apache Tomcat
The Guacamole client page is served by Apache Tomcat in this configuration. Create the Tomcat user first.
sudo useradd -m -U -d /opt/tomcat -s /bin/false tomcatThe Apache Tomcat binary distribution can be obtained via the official Tomcat downloads page.
cd ~/
wget https://dlcdn.apache.org/tomcat/tomcat-9/v9.0.82/bin/apache-tomcat-9.0.82.tar.gz
Extract the tar file to the /opt/tomcat directory as follows:
sudo mkdir /opt/tomcat
sudo tar -xzf apache-tomcat-*.tar.gz -C /opt/tomcat/
sudo mv /opt/tomcat/apache-tomcat-*/ /opt/tomcat/tomcatapp
Allow the user the necessary permissions to the /opt/tomcat directory.
sudo chown -R tomcat: /opt/tomcatThe directory /opt/tomcat/tomcatapp/bin should then be changed to allow the execution of all the shell scripts there.
sudo find /opt/tomcat/tomcatapp/bin/ -type f -iname "*.sh" -exec chmod +x {} \;Allow the directory to be accessible by configuring SELinux in permissive/disabled mode.
sudo setenforce 0The Systemd service for Tomcat will now be added, and it will be simple to start and stop it like other services on your server.
sudo vim /etc/systemd/system/tomcat.serviceAdd the lines below:
Description=Tomcat 9 servlet container
After=network.target

[Service]
Type=forking

User=tomcat
Group=tomcat

Environment="JAVA_HOME=/usr/lib/jvm/jre-openjdk/"
Environment="JAVA_OPTS=-Djava.security.egd=file:///dev/urandom -Djava.awt.headless=true"

Environment="CATALINA_BASE=/opt/tomcat/tomcatapp"
Environment="CATALINA_HOME=/opt/tomcat/tomcatapp"
Environment="CATALINA_PID=/opt/tomcat/tomcatapp/temp/tomcat.pid"
Environment="CATALINA_OPTS=-Xms512M -Xmx1024M -server -XX:+UseParallelGC"

ExecStart=/opt/tomcat/tomcatapp/bin/startup.sh
ExecStop=/opt/tomcat/tomcatapp/bin/shutdown.sh

[Install]
WantedBy=multi-user.target
Save it reload and start.
sudo systemctl daemon-reload
sudo systemctl enable --now tomcat
You should see Tomcat running;
$systemctl status tomcat
● tomcat.service
     Loaded: loaded (/etc/systemd/system/tomcat.service; enabled; preset: disab>
     Active:active (running) since Thu 2023-04-27 14:18:04 CEST; 17s ago
    Process: 124956 ExecStart=/opt/tomcat/tomcatapp/bin/startup.sh (code=exited>
   Main PID: 124963 (java)
      Tasks: 29 (limit: 23414)
     Memory: 164.2M
        CPU: 3.058s
     CGroup: /system.slice/tomcat.service
             └─124963 /usr/lib/jvm/jre-openjdk//bin/java -Djava.util.logging.co>

Apr 27 14:18:04 localhost.localdomain systemd[1]: Starting tomcat.service...
Apr 27 14:18:04 localhost.localdomain startup.sh[124956]: Tomcat started.
Apr 27 14:18:04 localhost.localdomain systemd[1]: Started tomcat.service.
Apr 27 14:18:22 localhost.localdomain systemd[1]: /etc/systemd/system/tomcat.se>
Apr 27 14:18:22 localhost.localdomain systemd[1]: /etc/systemd/system/tomcat.se>
#5. Configure the Guacamole Server.
All the native and server elements necessary for remote desktop conversations are included in the Apache Guacamole server. There are all libraries available that native components and guacd need.
Download the most recent Guacamole-server stable version. Guacamole release page
cd ~
VER=1.5.3
wget <https://downloads.apache.org/guacamole/$VER/source/guacamole-server-$VER.tar.gz>
Extract the archive you downloaded.
tar xzf guacamole-server-$VER.tar.gzEnter the extracted directory.
cd guacamole-server-$VERExamine every potential dependency and optimize as follows.
./configure --disable-guacenc --with-init-dir=/etc/init.dAfter that, build guacamole-server. The screen will scroll up with a lot of output as each component is assembled.
make
sudo make install
Refresh the installed library cache on the machine.sy
sudo ldconfigFor systemd to discover the guacd (Guacamole proxy daemon) service installed in the /etc/init.d directory, you must restart systemd.
sudo /etc/init.d/guacd restartStart guacd and check its status ;
sudo /etc/init.d/guacd start
sudo /etc/init.d/guacd status
#6. Setup Guacamole Web Application
There are two primary configuration files for Guacamole deployment:
Guacamole.war – file containing the web application
Guacamole.properties – This file contains the main configuration for Guacamole.
The suggested configuration for Guacamole calls for putting these files in common locations and then making a symbolic link so Tomcat can discover them.
Make the directories for the configurations first.
sudo mkdir -p /etc/guacamole/{extensions,lib}Get the Guacamole War file now.
cd ~
VER=1.5.3
wget https://downloads.apache.org/guacamole/$VER/binary/guacamole-$VER.war
Next, Put the downloaded file in the Guacamole directory and set the symbolic link of the file to the Tomcat directory.
sudo mv guacamole-$VER.war /etc/guacamole/guacamole.war
sudo ln -s /etc/guacamole/guacamole.war /opt/tomcat/tomcatapp/webapps
#7. Configure Apache Guacamole Server
We must specify how the client connects via guacd to the Guacamole server. The guacamole.properties file is where this configuration is made.
The configuration directory for Guacamole, which by default is placed at /etc/guacamole, is referred to as GUACAMOLE_HOME. This directory houses all configuration files, extensions, etc.
As seen below, create the GUACAMOLE_HOME environment variable.
echo "GUACAMOLE_HOME=/etc/guacamole" | sudo tee -a /etc/default/tomcatEstablish the properties file.
sudo vim /etc/guacamole/guacamole.propertiesAdd the line below:
guacd-hostname: localhost
guacd-port:    4822
When the setup is finished, save it and connect the Guacamole configurations directory to the Tomcat servlet directory, as shown below.
sudo ln -s /etc/guacamole /opt/tomcat/tomcatapp/.guacamole
sudo chown -R tomcat: /opt/tomcat
#8. Setup Guacamole Authentication Method
In order to authenticate users and connections, Guacamole pulls data from a single file named user-mapping.xml. But in this guide, we will use database authentication which is preferred for production deployments.
Installing MariaDB Server
Apache Guacamole supports multiple authentication methods, including database authentication, LDAP authentication, Radius, SAML, and OpenID. In this demo, you will be using database authentication via the MariaDB server for the Apache Guacamole.
Enter the dnf command below to install the MariaDB server. When prompted, input y to confirm and press ENTER.
sudo dnf install mariadb-server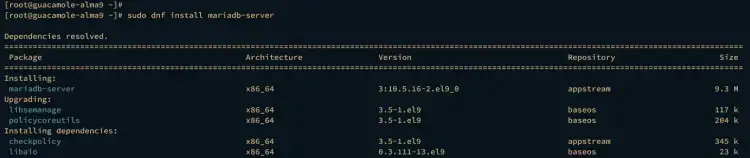
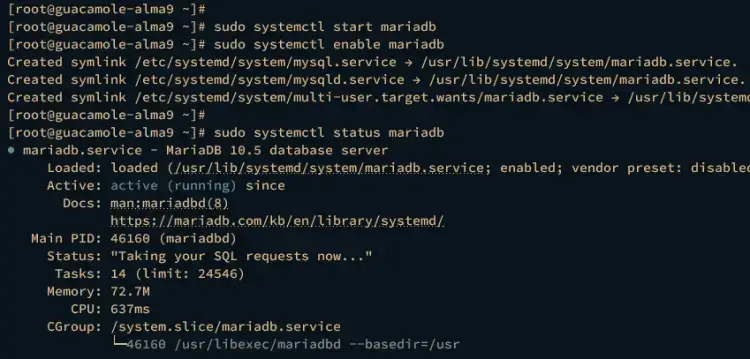
Next, run the following command to start and enable the mariadb service.
sudo systemctl start mariadb
sudo systemctl enable mariadb
Then verify the mariadb service to ensure that the service is running.
sudo systemctl status mariadbThe output should be active (running) when the mariadb status is running.
In the following section, you will secure your MariaDB server installation via the mariadb-secure-installation utility, then create a new MariaDB database and user for Apache Guacamole.
First, you will secure the MariaDB server via the mariadb-secure-installation utility. Run it to secure your MariaDB server installation.
sudo mariadb-secure-installationDuring the process, input y to apply the configuration or n for no. Below are some MariaDB configurations that you will be setting up:
- Switch the MariaDB root authentication to unix_socket? Input n.
- Set up MariaDB root password? Input y, then type a new password and repeat.
- Disable remote login for the root user? Inpu y.
- Remove default database test? Input y again.
- Remove default anonymous user? Input y to confirm.
- Reload table privileges to apply the changes? Input y.
Next, log in to the MariaDB server using the mariadb client command below as user root. When prompted for the password, input the MariaDB root password or press ENTER.
Once installed , access the MySQL shell:
sudo mysql -u root -pCreate a user and database for Guacamole:
CREATE DATABASE guacamole_db;
CREATE USER 'guacamole_user'@'localhost' IDENTIFIED BY 'Passw0rd!';
GRANT SELECT,INSERT,UPDATE,DELETE ON guacamole_db.* TO 'guacamole_user'@'localhost';
FLUSH PRIVILEGES;
QUIT
Now download the MySQL Connector. This can be achieved using the commands:
VER=8.1.0
wget <https://dev.mysql.com/get/Downloads/Connector-J/mysql-connector-j-$VER.tar.gz>
Extract and copy it to the Guacamole libraries:
tar -xf mysql-connector-j-*.tar.gz
sudo cp mysql-connector-j-$VER/mysql-connector-j-$VER.jar /etc/guacamole/lib/
You also need the JDBC auth extension, downloaded with the command:
VER=1.5.3
wget <https://downloads.apache.org/guacamole/$VER/binary/guacamole-auth-jdbc-$VER.tar.gz>
Extract and copy it to the required directory as shown:
tar -xf guacamole-auth-jdbc-$VER.tar.gz
sudo mv guacamole-auth-jdbc-$VER/mysql/guacamole-auth-jdbc-mysql-$VER.jar /etc/guacamole/extensions/
Now perform scheme migrations. But first switch to the below path:
cd guacamole-auth-jdbc-*/mysql/schemaNow run the below command to import schemas
cat *.sql | sudo mysql -u root -p guacamole_dbProvide the MySQL root password to proceed. After importing the schemas, we will make configurations to Guacamole
sudo vim /etc/guacamole/guacamole.propertiesAdd the below lines to the config:
###MySQL properties
mysql-hostname: 127.0.0.1
mysql-port: 3306
mysql-database: guacamole_db
mysql-username: guacamole_user
mysql-password: Passw0rd!
The following information should be placed in the guacd.conf file.
sudo vim /etc/guacamole/guacd.confAdd the content below:
[daemon]
pid_file = /var/run/guacd.pid
#log_level = debug

[server]
#bind_host = localhost
bind_host = 127.0.0.1
bind_port = 4822

#[ssl]
#server_certificate = /etc/ssl/certs/guacd.crt
#server_key = /etc/ssl/private/guacd.key
Restart Tomcat and Guacamole after saving the file.
sudo systemctl restart tomcat
sudo /etc/init.d/guacd restart
Set up the firewall to let traffic through ports 4822 and 8080.
sudo firewall-cmd --permanent --add-port={4822,8080}/tcp
sudo firewall-cmd --reload
#9. Using Guacamole Remote Desktop
Now that everything has been set up, you should be able to use the URL to visit your Guacamole web UI.
http://ip-or-domain-name:8080/guacamoleYou will be shown the window below.