Problem Definition:
Rocky Linux and other RPM based Linux distros, are delivered with standard yum repositories that serve software packages over the Internet.
But in some scenarios your are not able to connect your Linux server to the Internet, thus you cannot use the Linux package manager for software installation. In such a scenario, you have to install individual software packages using rpm command and resolve the dependencies manually.
Alternatively, you can setup a local yum repository from ISO file. And then you can use this yum repository with all the Rocky Linux 9 servers in your Data Center.
Here, we will show you the step by step process to setup a Rocky Linux 9 based Local yum repository.

Environment Specification:
We are using a Rocky Linux 9 minimal server with following specifications.
- CPU – 3.4 Ghz (2 cores)
- Memory – 2 GB
- Storage – 20 GB
- Operating System – Rocky Linux 9.0 (Blue Onyx)
- Hostname – local-yum-repo.centlinux.com
- IP Address – 192.168.116.131 /24
Gathering Linux Server Information:
By using a ssh client, connect with your linux-yum-repo.centlinux.com as root user.
Check the versions of your Linux Kernel and Linux operating system used in this tutorial.
# uname -r
5.14.0-70.13.1.el9_0.x86_64

# cat /etc/rocky-release
Rocky Linux release 9.0 (Blue Onyx)
Check the already enabled yum repositories in your Linux operating system.
# dnf repolist
repo id                         repo name
appstream                       Rocky Linux 9 - AppStream
baseos                          Rocky Linux 9 - BaseOS
extras                          Rocky Linux 9 - Extras
Downloading Rocky Linux 9 ISO:
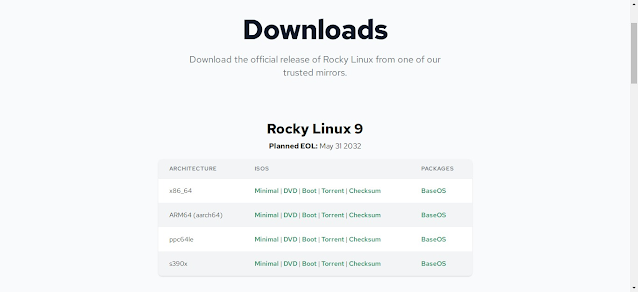
Rocky Linux is free to download. You can get it from Official website of Rocky Enterprise Software Foundation (RESF).

We have copied the downloaded ISO file in the home directory of root user i.e. (/root). Let’s execute ls command to check this.
# ls ~
anaconda-ks.cfg  Rocky-9.0-x86_64-dvd.iso
Mount Rocky Linux 9 ISO:
Create a directory to mount the Rocky Linux ISO. It is better to create the repo directory within Apache document root, so you can later publish this directory to the network for other Linux server in your Data Center.
# mkdir -p /var/www/html/repoTo auto-mount your ISO file, you need to add a directive in /etc/fstab file.
Open /etc/fstab file by using vim text editor.
# vi /etc/fstabAdd following directive in this file to auto-mount ISO file.
/root/Rocky-9.0-x86_64-dvd.iso /var/www/html/repo iso9660 defaults 0 0Execute the following command to mount all the entries from /etc/fstab file.
# mount -a
mount: /var/www/html/repo: WARNING: source write-protected, mounted read-only.
Create Local Yum Repository:
Create a directory and then move the existing yum repo files in it.
# mkdir /etc/yum.repos.d/old
# mv /etc/yum.repos.d/rocky* /etc/yum.repos.d/old/
There is a repo file is available in the Rocky Linux ISO. You can use it after some amendments.
By using cp command copy media.repo file at /etc/yum.repos.d directory.
# cp /var/www/html/repo/media.repo /etc/yum.repos.d/Now edit media.repo file by using vim text editor.
# vi /etc/yum.repos.d/media.repoUpdate the content of this file as follows.
[InstallMedia-BaseOS]
name=Rocky Linux 9.0 - BaseOS
mediaid=1657031221.5900638
metadata_expire=-1
gpgcheck=0
cost=500
baseurl=file:///var/www/html/repo/BaseOS

[InstallMedia-AppStream]
name=Rocky Linux 9.0 - AppStream
mediaid=1657031221.5900638
metadata_expire=-1
gpgcheck=0
cost=500
baseurl=file:///var/www/html/repo/AppStream
Remove the yum meta data by executing following dnf command.
# dnf clean all
20 files removed
Build yum cache for your local yum repository.
# dnf makecache
Rocky Linux 9.0 - BaseOS                        3.9 MB/s | 1.7 MB     00:00
Rocky Linux 9.0 - AppStream                      14 MB/s | 6.0 MB     00:00
Last metadata expiration check: 0:00:01 ago on Thu 21 Jul 2022 10:50:46 AM CDT.
Metadata cache created.
Publish Your Local Yum Repository:
Your local yum repository has been configured successfully. But to maximum utilization, you have to publish your repository to the network by using Apache web server, so other Linux servers in your Data Center can use it as well.
Install Apache web server by executing dnf command.
# dnf install -y httpdEnable and start Apache web server.
# systemctl enable --now httpd.service
Created symlink /etc/systemd/system/multi-user.target.wants/httpd.service → /usr/lib/systemd/system/httpd.service.
Allow the Apache service in Linux firewall.
# firewall-cmd --permanent --add-service=http
success
# firewall-cmd --reload
success
Create a repo file with following contents and then copied at /etc/yum.repos.d/ directory of other Rocky Linux 9 servers to let them use your local yum repository.
[InstallMedia-BaseOS]
name=Rocky Linux 9.0 - BaseOS
mediaid=1657031221.5900638
metadata_expire=-1
gpgcheck=0
cost=500
baseurl=http://local-yum-repo.centlinux.com/repo/BaseOS

[InstallMedia-AppStream]
name=Rocky Linux 9.0 - AppStream
mediaid=1657031221.5900638
metadata_expire=-1
gpgcheck=0
cost=500
baseurl=http://local-yum-repo.centlinux.com/repo/AppStream