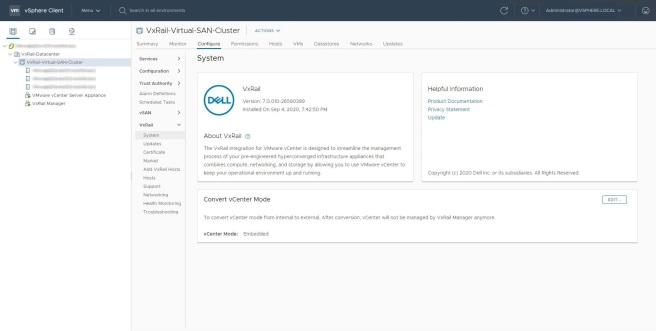
Configure VxRail Manager to be on your network.
My working set is that y’all don’t want to go into the Datacenter and plug into the top of rack switch and set your laptop to an IP on the 192.168.10.200 network (Default IP for VxRail Manager). My additional working set is that you don’t have the 192.168.10.200 network on a jump host somewhere in your environment. If the above working set is wrong skip down a few lines. If i am right then the next step will allow you remote access into VxRail Manager without having to leave your desk.
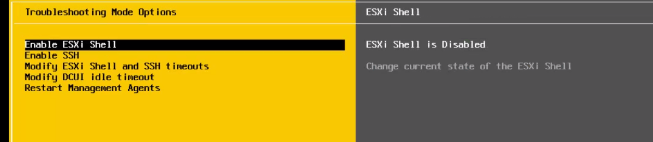
Enable ESXi Shell
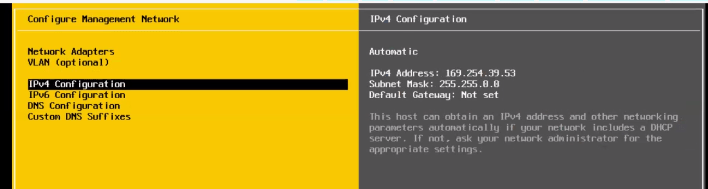
Change the network information on your first host to the static network information you entered into the PEQ.
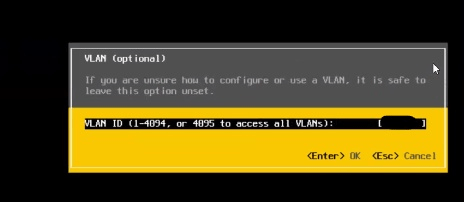
Set the Management VLAN to the VLAN associated with your static network information
Log into the ESXi Shell and set the network information
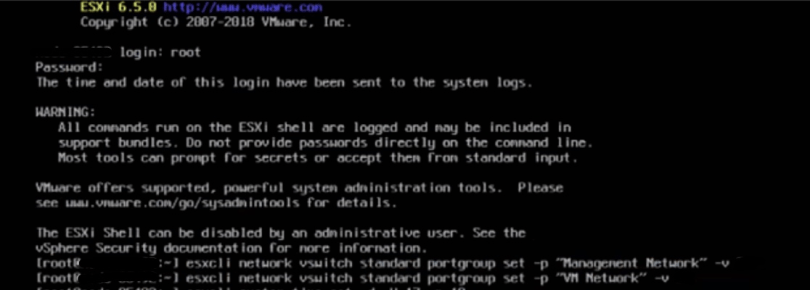
#esxcli network vswitch standard portgroup set -p “Management Network” -v <Your_VLAN_ID>
#esxcli network vswitch standard portgroup set -p “VM Network” -v <Your_VLAN_ID>
#/etc/init.d/loudmouth restart
ensure the clock on the host is within seconds of one another
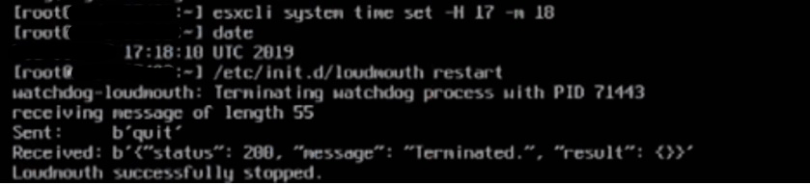
Verify time is correct using date command
#esxcli system time set -H [hour]  — use UTC  time
#Restart /etc/init.d/loudmouth
Log into the ESXi host via web browser
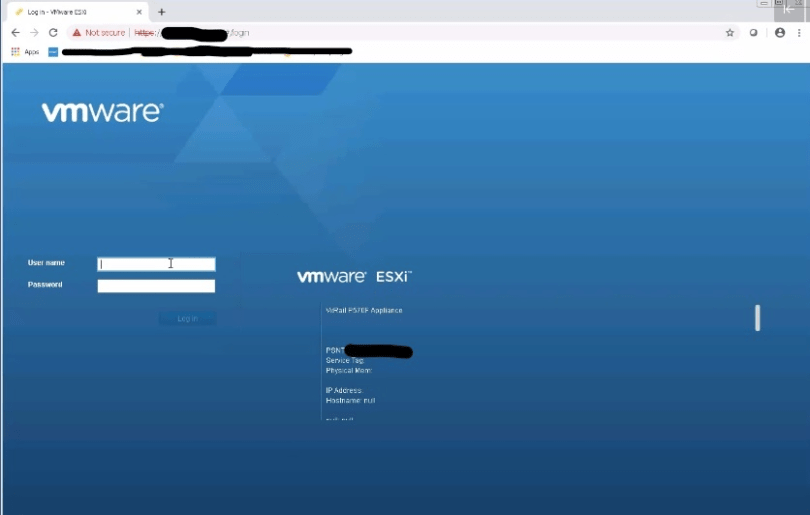
Go to Virtual machines>VxRail manager>Open Console – Log in as root
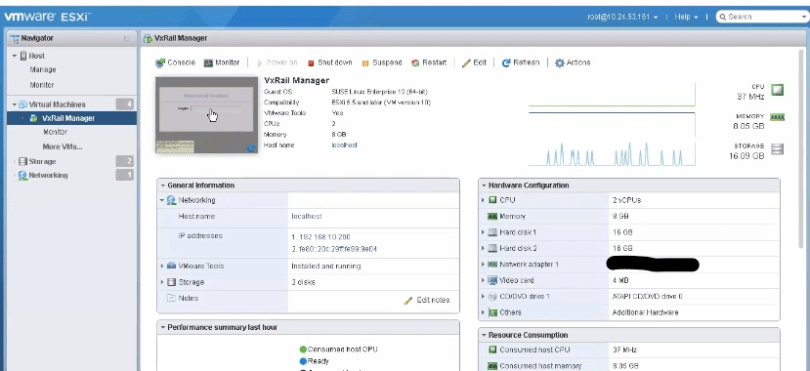
Need to set the new IP information for the VxRail Manager that is in the PEQ.
#/opt/vmware/share/vami/vami_set_network eth0 STATIC4 <IPAddr> <Subnet Mask> <Gateway>
Confirm VxRail Manager date and time matches host
#date
Remove the static IP you set on Host1.
Rinse and repeat setting VM Management & VM Network & Date/Time on the remaining hosts.
Put the IP for VxRail manager in your web browser and confirm you can log in.
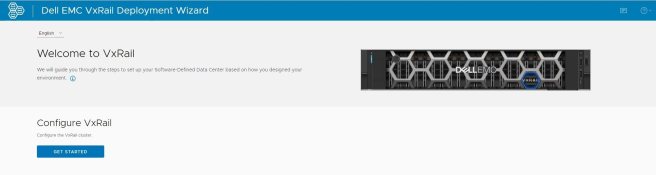
In VxRail 7.0, you will use a new deployment wizard for VxRail initial configuration. Let’s begin with a walk-through of the VxRail installation process, click the “Get Started” button.
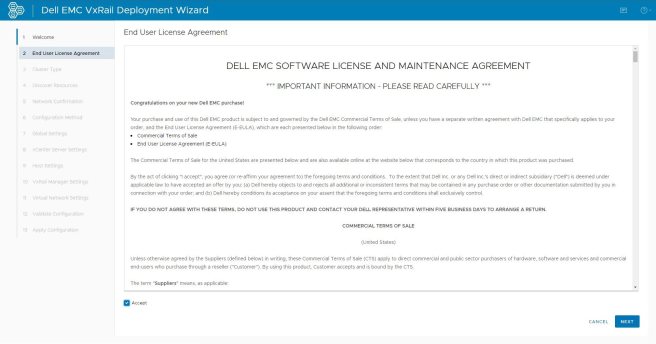
Click “Accept” to agree to the End-User License Agreement, then click “Next” to continue.
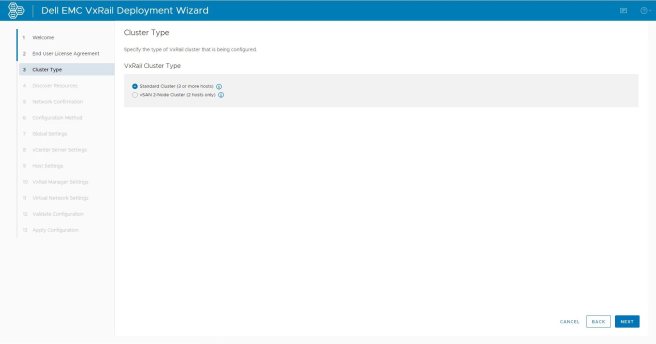
Specify the type of VxRail cluster that is being configured
Standard Cluster can be deployed with as few as three nodes and as many as six, and can scale out for larger data center environments.
vSAN 2-Node Cluster can contain two nodes only, and works well for smaller environments, including remote or branch offices.
Let’s deploy a standard cluster. Click “Next” to scan the network for available VxRail nodes to configure.
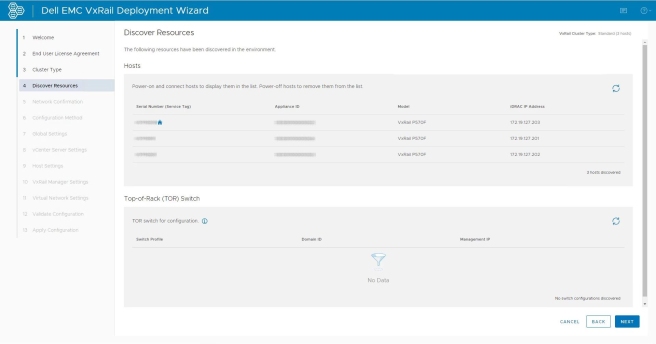
Three nodes have been discovered. One of the nodes will be tagged with a blue house icon, indicating it has won the election process to run the VxRail Manager VM and facilitate the installation.
Click “Next” to continue.
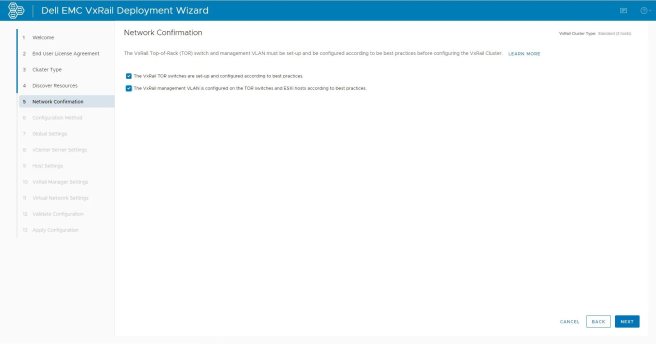
Confirm that you have configured the TOR switches and VxRail management VLAN and ESXi hosts according to best practices, select all then click “Next” to continue.
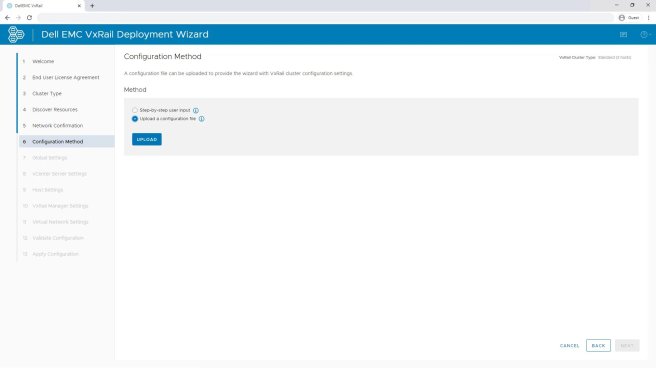
You can choose either “Step-by-step user input” or “Upload a configuration file” Dell EMC provides a pre-installation Excel spreadsheet which, upon completion, generates a JSON-formatted configuration file.
In this demonstration, we will import an existing JSON configuration file, and review the imported values step by step. Click “Upload” to continue.
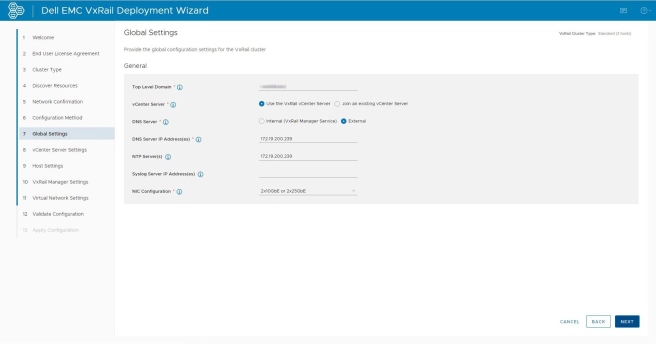
The “Global Setting” tab is used to configure system settings such as the NIC configuration, vCenter type, and DNS and NTP servers. Click “Next” to continue.
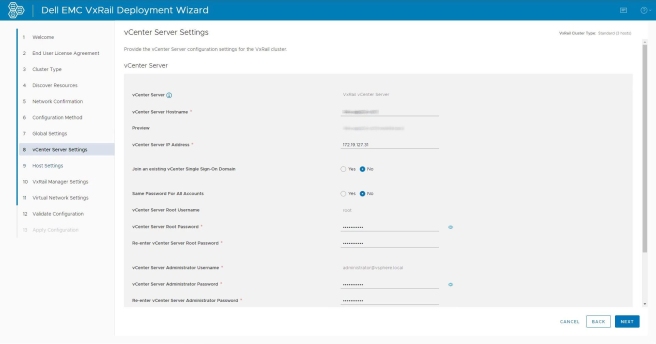
The “vCenter Server Settings” tab allows configuration of the internally hosted vCenter host names, affiliated IP addresses and administrative credentials. Click “Next” to continue.
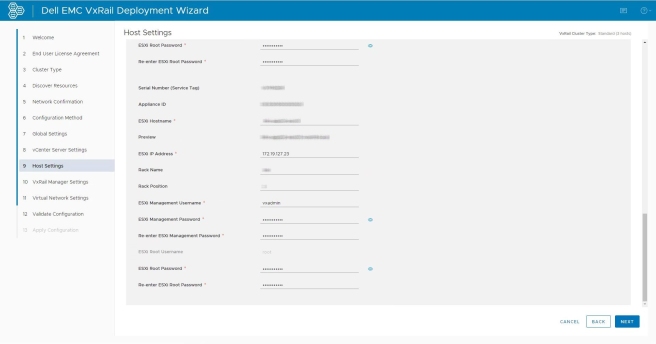
The “Host Settings” tab is where the individual host names and IP addresses are specified.
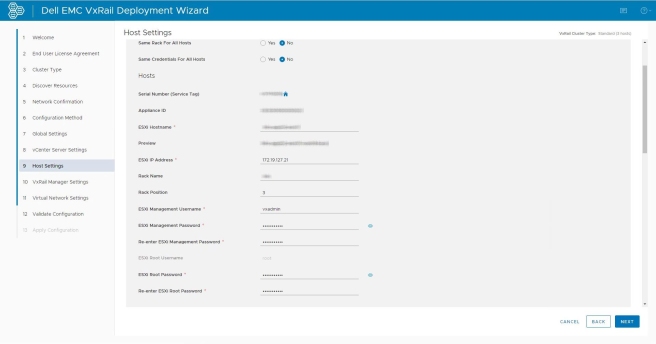
Physical location details like Rack Name and Rack Position can also be configured for each host. Click “Next” to continue.
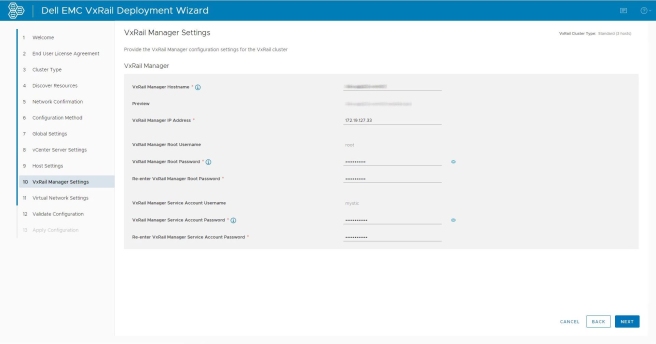
The “VxRail Manager Settings” tab allows configuration of the VxRail Manager host name, IP addresses and administrative credentials. Click “Next” to continue.
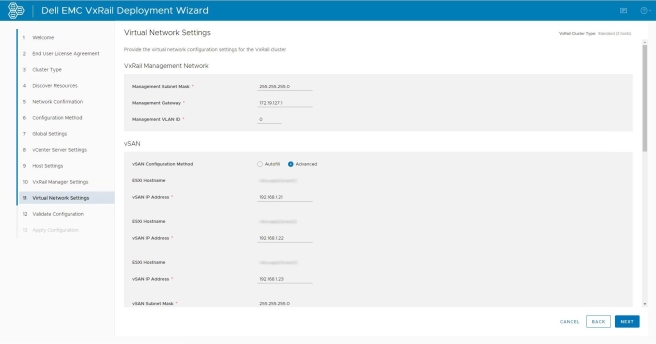
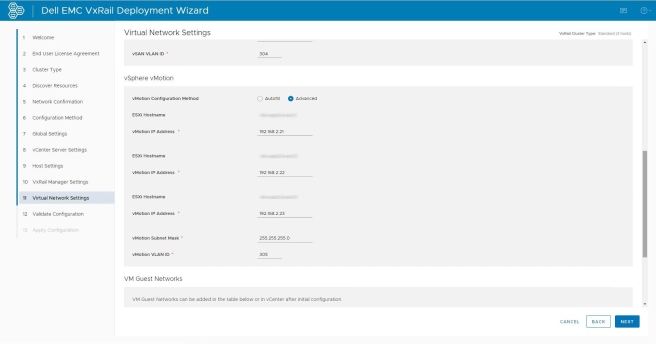
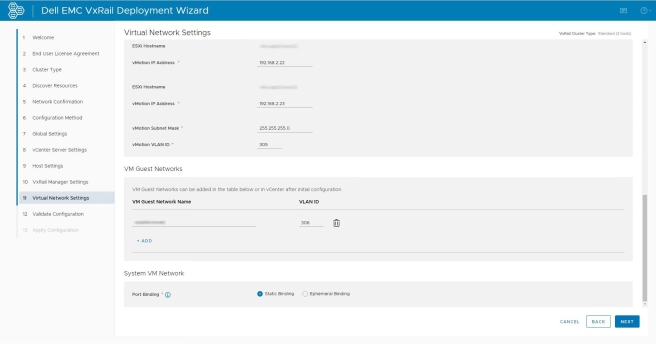
The “Virtual Network Settings” tab allows configuration of the VxRail Management Network, vSAN, vMotion and additional Guest VMs.
Remark: Before taking this step you should have already configured your top of rack switch.
Specify a starting IP range for the vSAN network, or assign individual addresses to each host if desired.
vCenter NIC Teaming and NIC-level and port-level network redundancy policies (including active/active) will be applied if present in the configuration file.
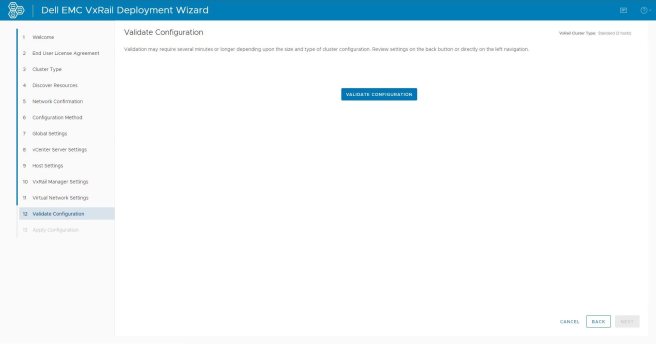
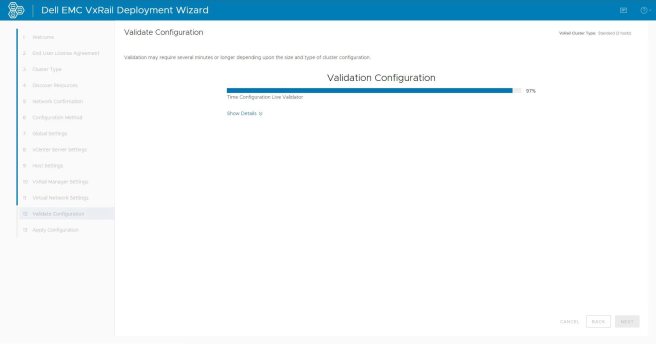
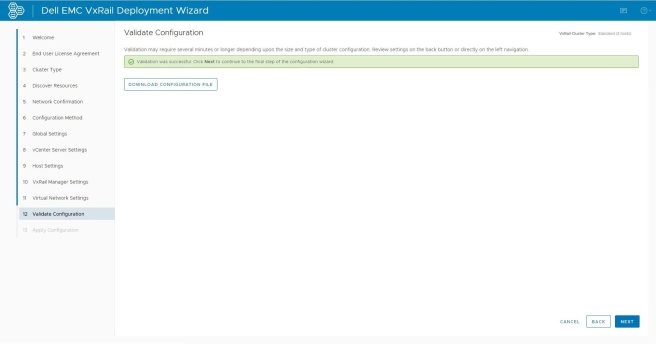
The next step is to validate these configuration details. The appliance will stand up a small network and test the configuration of the top of rack switch. VxRail Manager will ensure that no IP addresses are being reused, that it can reach the DNS and NTP servers, and that all nodes can talk to each other.
Click “Validate Configuration” to ensure everything is properly configured.
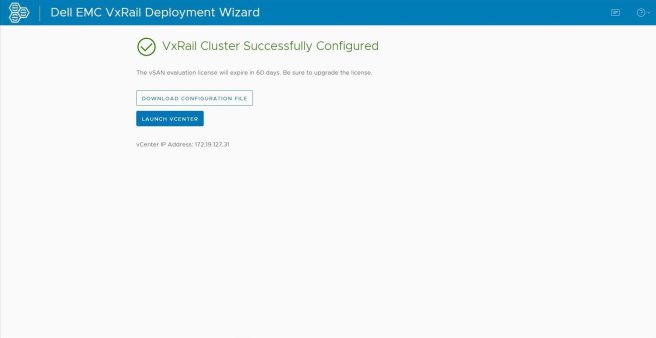
Since everything passed validation, we now have the option to build the cluster. Before doing so, let’s download the JSON file and perform one final review of the configuration. Click “Download Configuration File“, then click “Next” to continue.
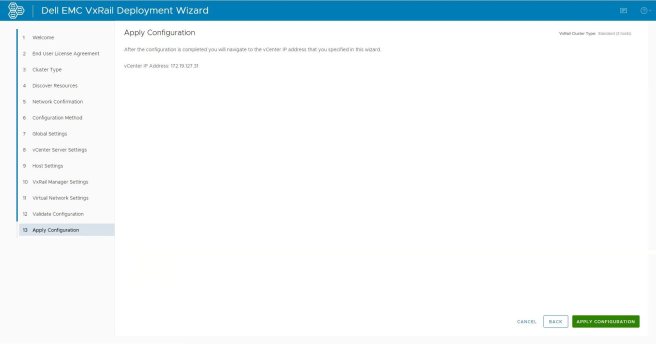
We are ready to begin the VxRail installation. The VxRail installation automation process is efficient, consistent, and repeatable. It combines vCenter, ESXi hosts, HA, and VxRail Manager, ensuring a properly configured VxRail cluster as an outcome.
Click “Apply Configuration” to deploy your environment.
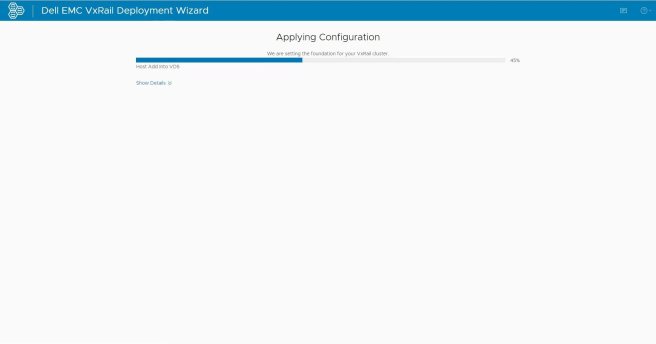
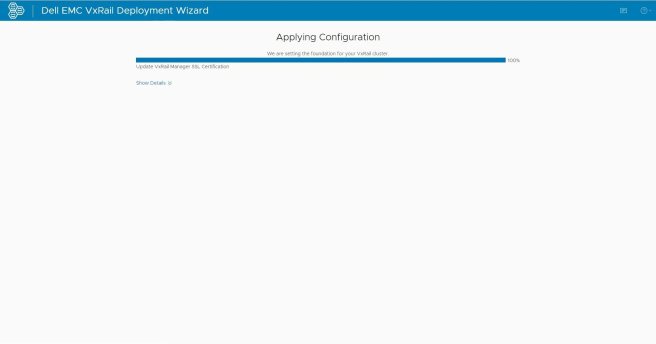
After a few minutes, VxRail Cluster successfully configured and you are ready to begin using VxRail. Click “Launch vCenter” to configure the VxRail Manager.
You can see there are three nodes are running the VxRail cluster, VxRail Manager and VCSA VM are ready.