List of target upgrade versions from supported source version along with the certificate, data source support.oracle.com.
Direct Upgrade Version List:
| Source DB Version | Target DB Version |
| 18.1 | 19c |
| 12.2.0.2 | 19c |
| 12.1.0.2 | 19c |
| 11.2.04 | 19c |
Indirect Upgrade Version List:
| Source DB Version | Intermediate DB Version | Target DB Version |
| 12.1.0.1 | 12.1.0.2/12.2.0.1 | 19c |
| 11.2.0.1/11.2.0.2/11.2.0.3 | 11.2.0.4 | 19c |
| 11.1.0.6/11.1.0.7 | 11.2.0.4 | 19c |
| 10.2.0.2/10.2.0.3/10.2.0.4/10.2.0.5 | 11.2.0.4/12.1.0.2 | 19c |
| 10.1.0.5 | 11.2.0.4/12.1.0.2 | 19c |
| 9.2.0.8 or earlier | 11.2.0.4 | 19c |
19c Certificate:
Below are the environmental details of this demonstration.
| COMPONENTS | SOURCE | TARGET |
| Database Name & Type | LABDB03, Standalone | LABDB03, Standalone |
| Database Version | 12.2.0.1 | 19.3.0.0 |
| Oracle Home | /u01/app/oracle/product/12201/db_1 | /u01/app/oracle/product/1930/db_1 |
| DB Server Type | Linux, OEL 7.9 | Linux, OEL 7.9 |
We will complete the upgrade from 12c to 19c using DBUA in the below three-part followed by detailed steps.
1. Pre-Checks / Pre-Steps
2. Upgrade Dataase using DBUA
3. Post upgrade Steps
1. Pre-Checks / Pre-Steps
Click here to get all steps for prechecks and follow section 1. Pre-Checks / Pre-Steps.
2. Upgrade Dataase using DBUA
2.1: Set Environment: Set/Export the environment for 19c i.e new ORACLE_HOME
2.2: Launch DBUA: Launch dbua tool.
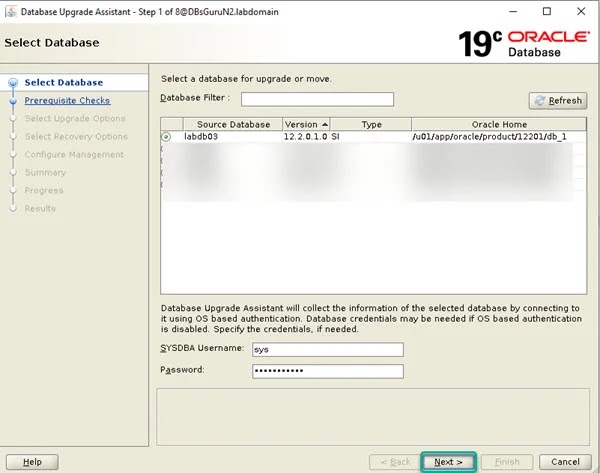
2.3: Select Database: Select the database name which is required to be upgraded and also put the SYS password then click Next.
2.4: Prerequisite checks: Upgrade checks performed by dbua, once 100% looks good i.e there should not be any warnings, click on Next.
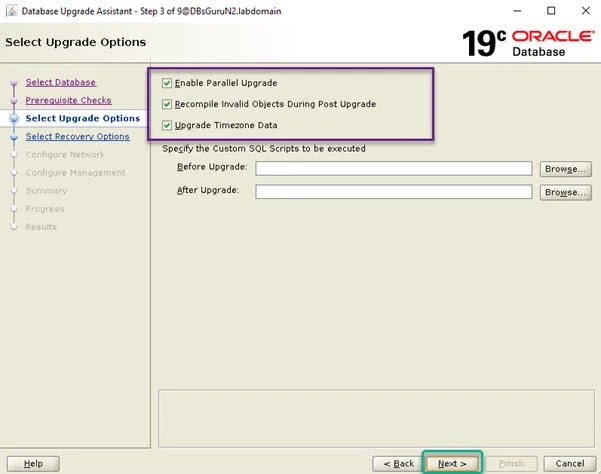
2.5: Upgrade options: Check the below options and click Next:
A. Enable parallel options.
B. Recompile invalid objects while post-upgrade.
C. Upgrade Timezone.
2.6: Backup & recovery options: Select option I have my own backup and recovery strategy since we have our own backup along with guaranteed restored options which have been performed in the prechecks step and click Next.
2.7: Network configuration (Listener): You can select the existing Listener name if it’s running from the same upgraded ORACLE HOME 19c else create a new Listener in case no LISTENER service from the new ORACLE HOME/version and click Next.
2.8: Configuration management: Safely skip this screen if not using EM and click Next.
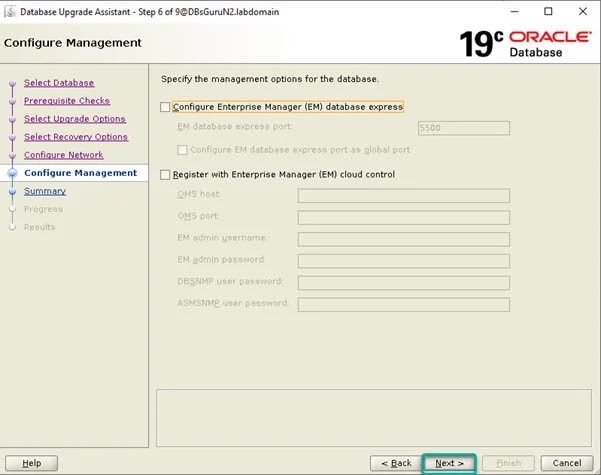
2.9: Summary: Review the summary carefully which tells you about options opted from step 3 to step 8 along with the OLD & NEW version and HOME of the database. Still, we have the option to edit, upon completion of review/edit click on Finish.

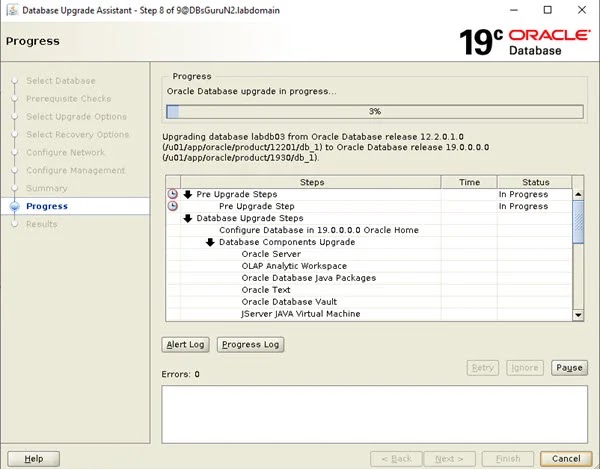
2.10: Upgrade in progress: Take a long breath and closely monitor upgrade progress along with the database alert log and DBUA log. Here you also have an option to Pause your activities.
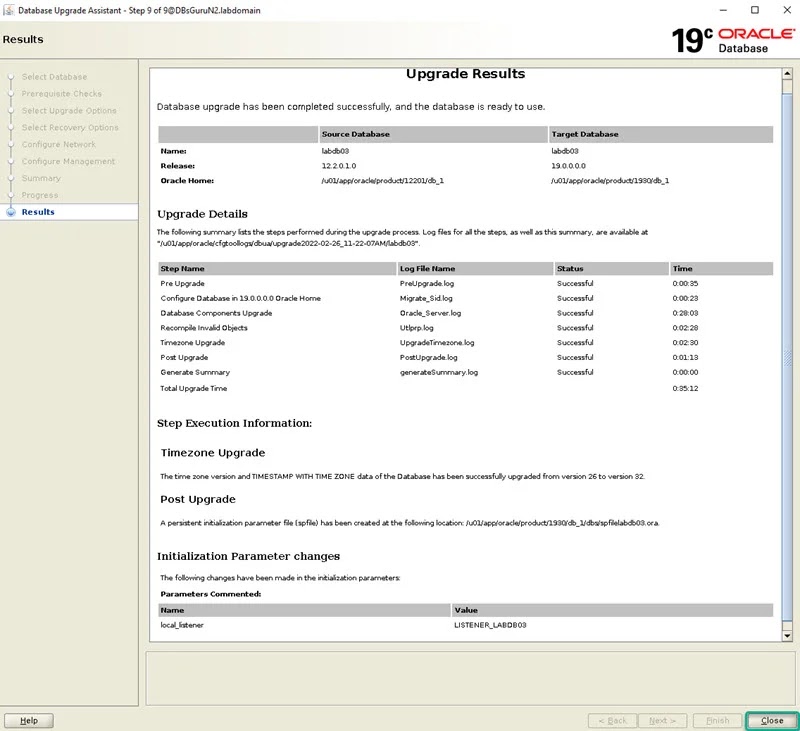
2.11: Upgrade Results: This is the last screen of the upgrade where you can review the result of the upgrade like database name, before and after upgrade version, components status along with the time taken in the upgrade, Timezone version, etc and click on Close.
3. Post upgrade Steps
3.1: Review upgrade log: Go to upgrade log location and review log files.
3.2: Validate oratab: Validate in the file /etc/oratab, new ORACLE_HOME for 19c should be updated by dbua tool.
3.3: Validate the Database: Set the environment in the new terminal and login to the database.
3.4: Execute postupgrade_fixups.sql: Execute postupgrade_fixups.sql which was generated in step 1.1.
3.5: Execute utlrp.sql and validate Objects Status: Execute utlrp.sql and validate invalid objects in the database, should not be any invalid objects after the upgrade. You may ignore invalid objects which are owned by non-default users subject to the status prior to the upgrade.
3.6: Execute utlusts.sql post-upgrade validation tool: Execute utlusts.sql to validate upgrade status and review the output.
NOTE: DST version should be must 32 and this is part of a successful upgrade.
3.7: Set the parameter Compatible: Change the COMPATIBLE parameter value to 19.0.0 to enable to use of all features of the upgraded version. This step is a very crucial step in terms of downgrading the database to the previous version or restoring guaranteed restore point. Make sure before the set a new value of COMPATIBLE parameter no major impact to DB in terms of performance, if possible test application for few days with an existing value of this parameter especially for the lower environment (DEV/TEST/UAT) upgrades so you have enough confidence to change it when you perform in PROD databases upgrade.
3.8: Drop Guaranteed Restore Point: Drop restore point only after successful validation along with green signal by dependent applications/checkout.
3.9: RAC DB Action: Follow the below steps for the RAC database only.
3.9.1: Set cluster_database to TRUE.
3.9.2: Upgrade the Oracle Clusterware keys for the database.
3.10: Listener Status: Validate the services for the database.
3.11: Password file and Pfile: Create a password file and pfile as required and this is a completely optional step.
3.11.1: Password File Creation.
3.11.2: Pfile Creation.
3.12: Others:
3.12.1: Enable cronjobs/scheduler jobs/Triggers if any.
3.12.2: Delete blackout database in OEM.
3.12.3: Start all dependent applications.
This document is only for learning purpose and always validate in the LAB environment first before applying in the LIVE environment.
Hope so you like this article!


