You need to create a vSphere Cluster (enable HA, DRS and vSAN), then add two vSAN nodes into this cluster.
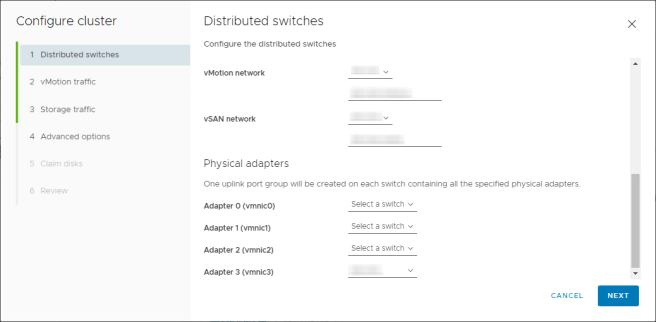
Now we can start to configure the 2-node vSAN cluster. Select the predefined Distributed Switch for vMotion and vSAN network, then Next.
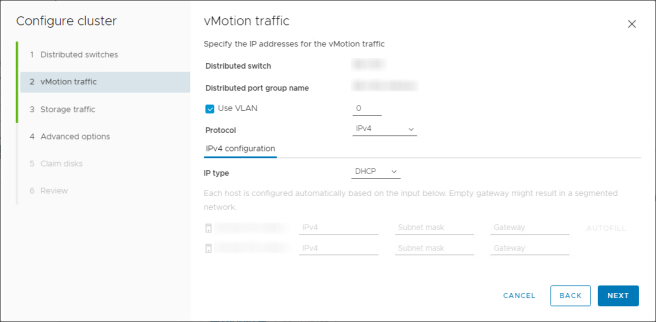
Specify the IP address for the vMotion network, then Next.
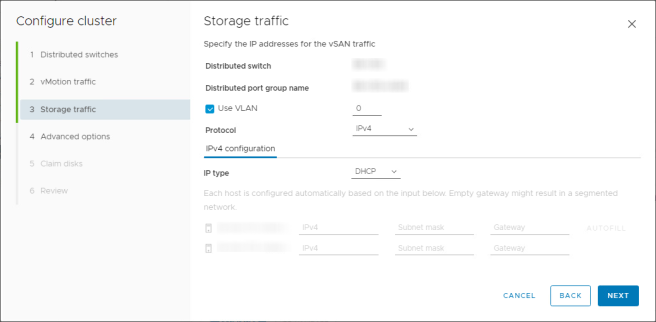
Specify the IP address for the vSAN network, then Next.
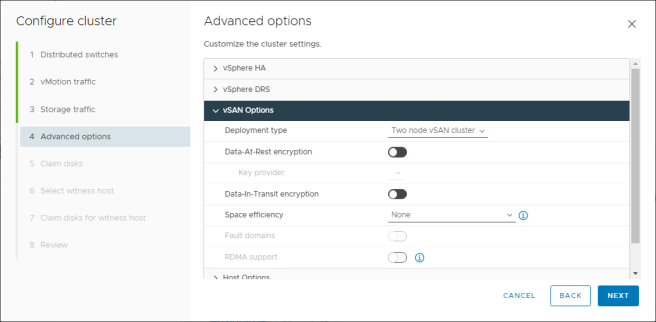
Select “Two node vSAN cluster” on deployment type menu, then Next.
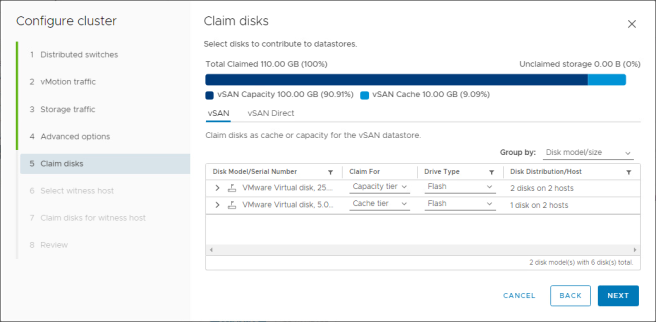
Claim the disks for cache and capacity tiers, then Next.
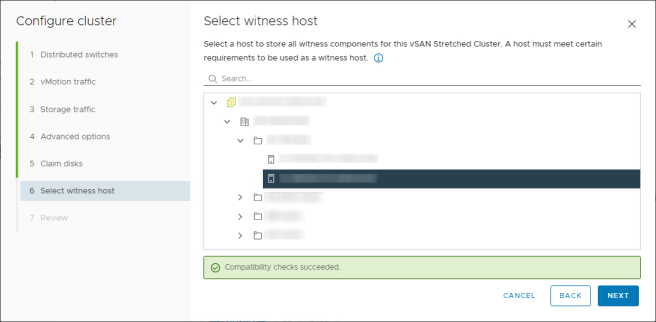
Select predefined vSAN witness host, then Next.
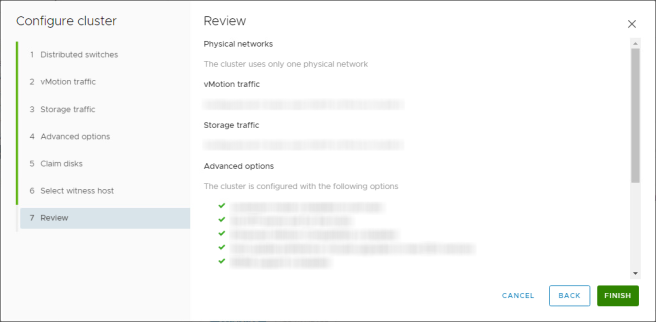
Review the summary, click “Finish” button to deploy the 2-node vSAN cluster.
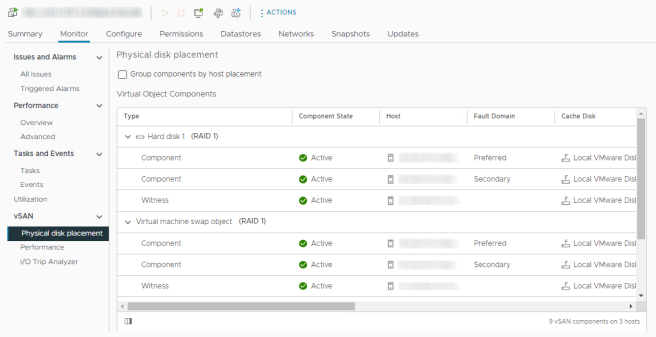
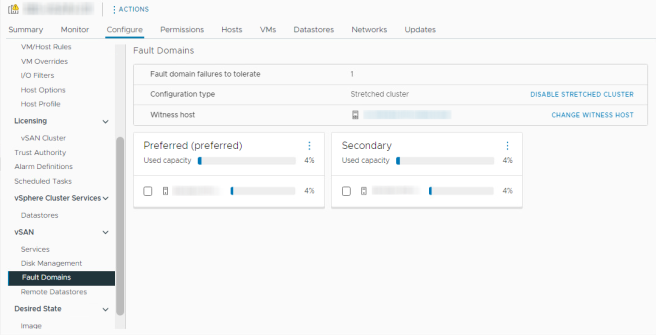
You can see three Fault Domains (Preferred, Secondary and Witness host) after the configuration is completed.
You can see three vSAN components for each VM after you apply the vSAN storage policy (FTM=RAID-1, FTT=1) into the virtual machine.